

The great majority of our shoots involve some form of lighting, and while it might sometimes looks like we are scrambling around searching for power outlets, running “stingers” (what normal humans call extension cords), and setting up lights and stands just to put on a big show, there really is a purpose for every pice of gear we choose to employ on set.
Every situation is different, but allow us to demonstrate with an example.
Recently, we were hired to produce a handful of cooking segments with four talented female chefs. Like any cooking show you might watch on television, these videos featured a chef that talked to camera while demonstrating how to prepare a dish. The kitchen at our shooting location was small and very neutral and white. The walls soaked up the natural lighting that poured from the kitchen window! The problem was… on our shooting day the sky was dark and gray. The kitchen was pretty dark, and we already knew that we didn’t want to turn on the overhead lights—or any artificial looking lights for that matter. We were going for a bright, sunny, “naturally lit” look. We ended up using three lighting instruments and some modifiers to get the look the client wanted.
Here’s a rough schematic that demonstrates our setup:


To the right of our scene was the kitchen window, and to the left was an open doorway that led to a glass door. We blocked the ambient light that was coming from that doorway with a 4×8 floppy solid on a c-stand. This side of the room (the left of our frame) was going to be the “fill” side, or darker side, so by covering the light source we eliminated the possibility of changing light levels from outside messing up our look.
As you can see above, we had a three camera setup. Our A CAM was front and center and maintained a wide shot of the chefs while they talked to camera. B CAM and C CAM had longer lenses and were focused on any food prep or cooking action talking place on the island or the stove, respectively.
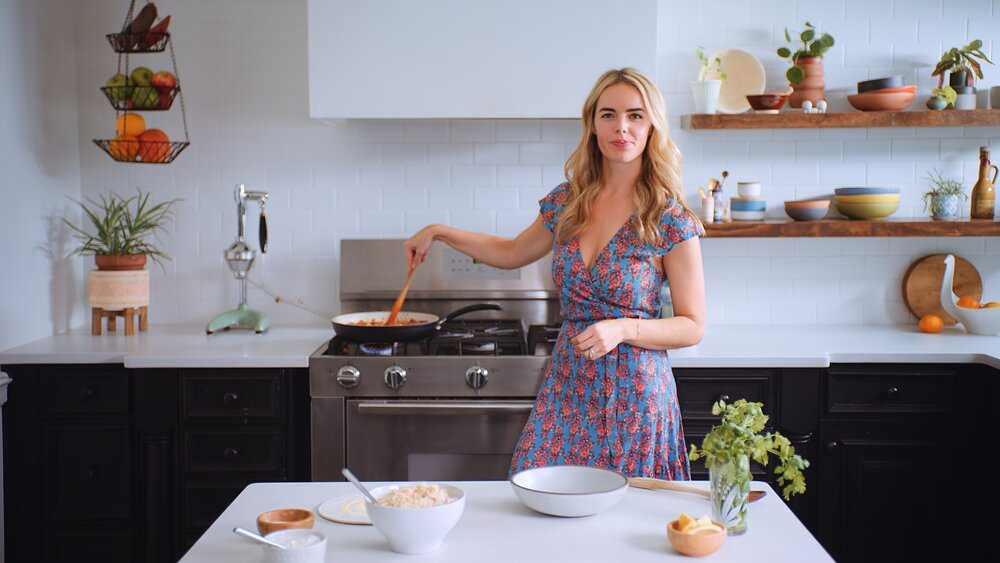
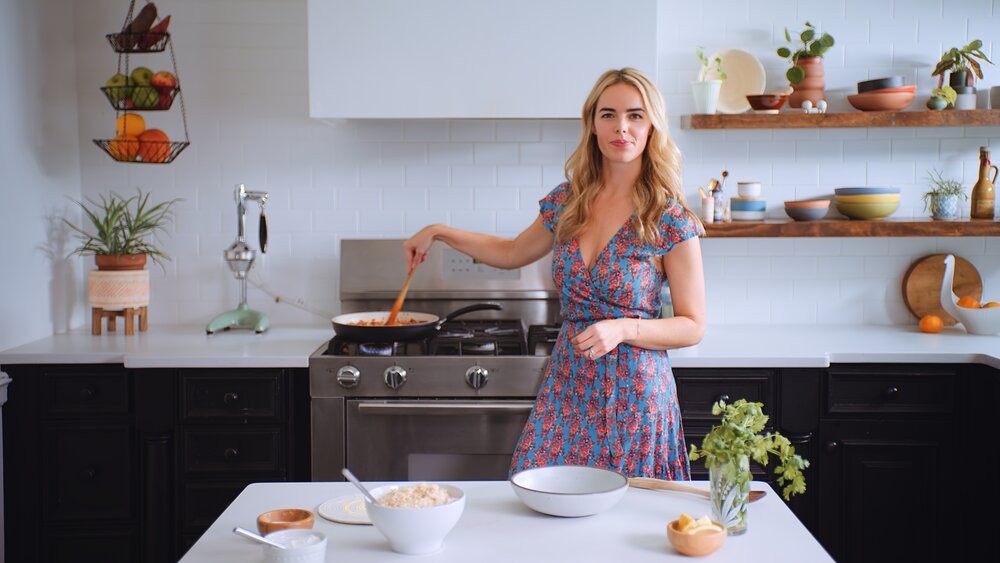
Here are those three angles with Serena Wolf (author of ‘The Dude Diet’ and domesticate-me.com) in the kitchen:


Looking good! But those are our “after” photos. Here’s an image that demonstrates how the kitchen looked when lit only by ambient light coming through the kitchen window from the overcast sky:


As you can see, this wasn’t exactly the bright and colorful look we were going for. There was a lot of work to do.
Outside the kitchen window, we raised up a retrofitted 4×4 Kino Flo fixture with four 4’ bicolor LED Quasar tubes high on a three-stage Matthews beefy baby stand. This light mimicked a bright sky light, served as our key light (brightest light) on Serena, and added a great deal of shape to the shelves in the back corner of the kitchen. Take a look:


We noticed that occasionally B CAM would need to pan over to the kitchen sink underneath the window to catch some action, which revealed our light through the window. To solve this, we cut out a piece of Lee 216 frost diffusion and taped it to the outside of the offending half of the kitchen window. The result looked on camera like a blind that had been pulled down over the window and also helped to soften the key light on Serena when she stepped forward toward the island.
With the key light looking great, we needed to bring up the overall ambiance in the room so that the shadowed areas (anywhere the key light wasn’t hitting) wouldn’t be quite so dark. To do this, we added a Hexolux XUM D7 LED fresnel fixture to the right back corner of the kitchen, spotted it about 70%, and blasted it into the kitchen ceiling to the left side of frame. This light serves as our fill light. By keeping our fill light to the same side of the room as our key light, we eliminated the chance of having any “double shadows” crisscrossing from different directions, which would have given away the fact that lights were being used. Here’s the scene with our fill light in place:


Now we still have some contrast ratio on Serena between our key side and fill side without the ratio being overly dramatic.
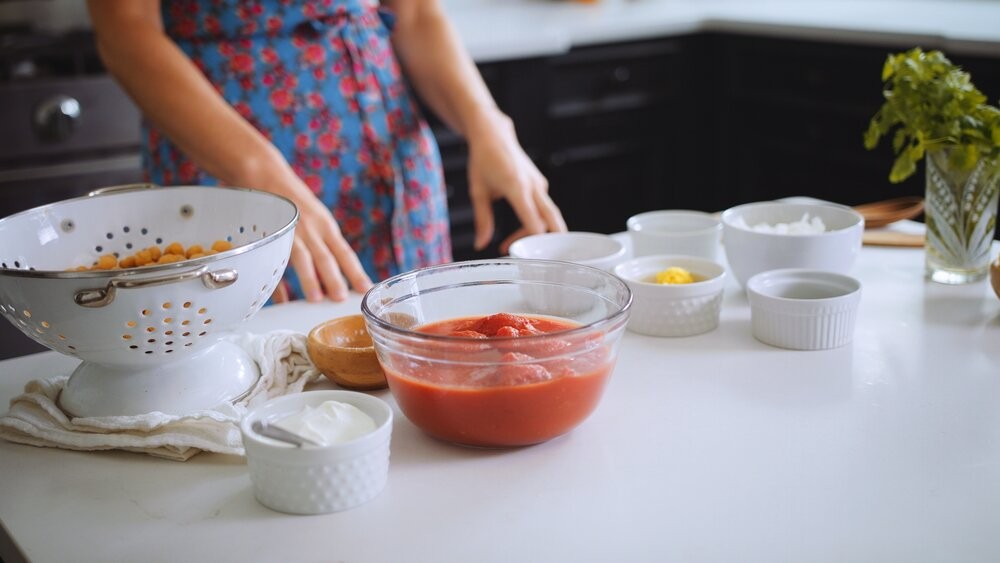
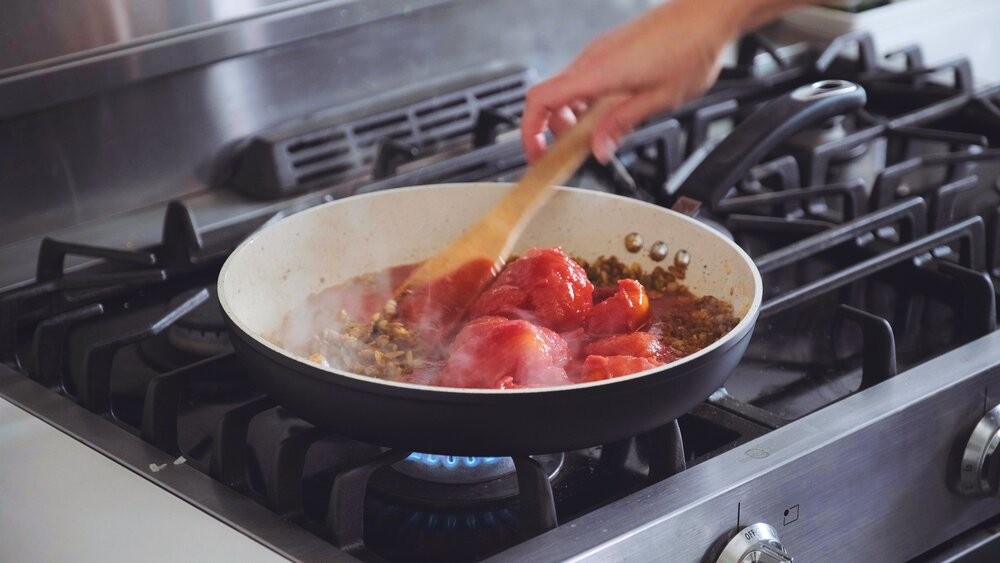
Lastly, we knew that a lot of food preparation and the final plating were going to take place on the island, and the island still felt a little too dark to allow us to see all the nice color and details in the ingredients that were going to be featured. To bring up the levels on the island, we set up a 2×1 Westcott Flex Cine RGBW LED. We diffused the light with a soft box and artificial silk, and then added an egg crate to the front. The egg crate allowed us to employ soft lighting while still maintaining control over the direction so that our island could be lit without affecting other parts of the scene in unwanted ways. Here’s our final look:


With the light on the island now brought up to proper levels, we’ve managed to create an evenly lit, bright, and colorful scene that mimics the look of a sunny day. Better yet, by relying on our own lighting instruments to light the scene instead of the fickle weather, we eliminate changing variables and don’t have to worry too much about having to adjust lighting throughout the day.
In cooking, great meals come together when a good recipe is executed with skill and patience. Our lighting design is the same. Each light was chosen, placed, and modified with a purpose in mind, and the end product reveals that we created a good lighting recipe. Ultimately, the high production quality and polished look of our work is not just the result of high end equipment, but of us being skilled in how to use it.